|
~ 5 hour Baby Sweater Pattern ~
(aka 'The Weekend Sweater'!)
Pattern
adapted and corrected by Jennifer Cox, Beth Koskie and Beverly A.
Qualheim (adaptations Copyright 2002)
UPDATED:
March 2014, 2025 -- this pattern is basically my own
version at
this point, as I have spent time after time, fixing errors and such.
I have ripped out, tested, retested, ripped out, re-added
over
and over and over this time. For the one on my 12" Tiny Tears
doll I used baby yarn and size 5 needles
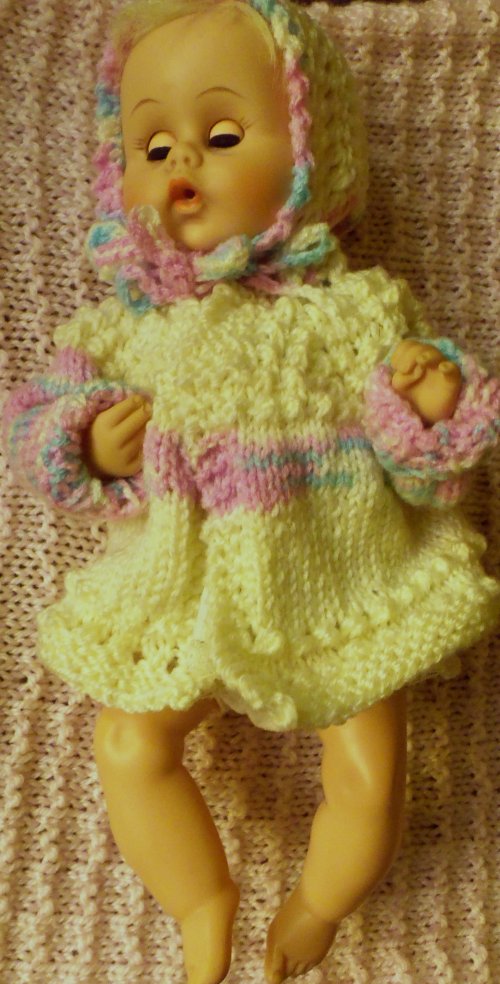
(Doll/preemie sweater = 6.5" from shoulder to bottom of sweater- her
bonnet pictured was made using this
pattern.)
Bev
Qualheim

 Materials : Materials : 
4 oz. (120 g) soft,
worsted weight (#4) yarn
[Ed. note: 55-75
yd/oz, 180-240 m/100g ]
size
10-1/2 (6.5 mm) needles (full-term 7-8 lb baby), size
8 (5
mm) or size 5 (3.75 mm) needles for preemie baby sizes
(I use baby yarn/DK yarn for preemie sizes)
(be sure needles are at
least 13" long or use circulars)
4 stitch holders.
Gauge with size 10.5 (6.5
mm) needles: 4 sts = 1" 5 rows = 1"
(♥ note:
increase sts by "Knitting into front of stitch. Before slipping stitch
off needle, place right needle behind left and knit again into back of
stitch. Slip original stitch off left needle.")
Abbreviations: K =
knit, P = purl; K2tog = knit 2 together; YO = yarn over; inc
= increase; sts = stitches
Cast
on 34 sts for neck
edge
Note
Always keep first and last 3 stitches in "knit" even on a "purl" row.
AND, to keep counts just right, BE SURE to follow directions
given!
Row 1: K
Row 2: K (34st)
Row 3: K3
*P2tog, YO. Repeat from * ending P2 tog, (Don't YO after this last "P2 tog"
or your counts will be off!), then K3 (33st)
Row 4: K (33st)
Row
5: K3, P to last 3 sts, K3 (33st)
Row
6: K3 *inc 1 by knitting ♥ once
in the front of the stitch, then once in the back ; K1. Repeat from * ending with
and inc 1, K3 (47 st)
Row 7: K3,
P to last 3 sts, K3
Row 8: K3
*K2tog. Repeat from * ending K4. (27 sts)
Row 9: K3 *K1,
insert needle under next horizontal loop of row below (between sts) and
knit this st. Repeat from * across, ending K4 (47 st)
Row 10: K3 *
inc 1 st in next st, K2. Repeat from * end inc. 1, K4 (61 sts)
Row 11: K3, P
to last 3 sts, K3 (61sts)
Row 12: K3, *K2
tog. Repeat from * ending K4 (34 st)
Row 13: Same as
row 9. (61 st)
Row 14: K4 ♥ *inc
1 in next st, K3. Repeat from * ending with inc. 1, K4 (75 st) (took
me 1 hour to get this far)
Row 15: K3, P
to last 3 sts, K3 (75 sts)
Row 16: K3 *K2
tog. Repeat from * ending K4 (41 st)
Row 17: K3 *K1,
insert needle under next horizontal loop of row below (between
sts) and knit this st. Repeat from * across, ending K4 (75 st)
Row 18: K4 *inc
1 in next st, K4. Repeat from * to end, ending with inc. 1, K5
(89 st)
Row 19: K3, P
to last 3 sts, K3
Row 20: Same as
row 16. (48 st)
Row 21: Same as row
17. (89 st)
Row 22: K5 *inc
1 in next st, K5. Repeat from * to last 5 sts-K. (103 sts)
Row 23: K3, P
to last 3 sts, K3 (103 st)
Row 24: Same as
row 16. (55 st)
Row 25:
Same as row 17. (103 st)
Row 26:
K17 (front), inc 1 in next st, place marker (pm), inc 1 in next st, K
15 (sleeve), inc 1 in next st, pm, inc 1 in next st, K 31 (back), inc 1
in next st, pm, inc 1 in next st, K 15 (sleeve), inc 1 in next st, pm,
inc 1 in next st, K17 (front) (111 st)
(keep moving markers on each row)
Row 27: ( this is
a good place change colors.) K3, P to
last 3 sts, K3 (111 st)
Row 28:
Knit, increasing 1 st at each side of markers (119 sts)
Row
29: Same as row 27.
Row 30:
Same as row 28. (127 sts)
 Row 31: K3, P to last 3
sts, K3 Row 31: K3, P to last 3
sts, K3
Row 32:
K21, place on holder, (remove
markers as you place sts on holders.) K
23 sleeve st and keep on needle, place rest of stitches on holders --
39 for back, 23 for other sleeve, 21 for other front.
Sleeve
(make sure you get the sleeve and don't knit the front)
Rows 1-16 : work in
stockinette st (Knit one
row, purl one row)
Row 17: K2tog
*P1, K1, P1, K2tog. Repeat from * ending with K2tog,
P1. (18 sts).
Rows 18-22:
Work K1 P1 rib.
Bind
off loosely. Cut 12" yarn tail for sewing arm seam. (took me 4 hours to get this
far)
<--- Remove
the 23 sts for the other sleeve, and place them on needles. Work other
sleeve the same as the 1st sleeve (Look at Row 26 to see which
holder has the sleeve sts.)
Remaining Sweater:
With
wrong side of sweater facing you, carefully open stitch holders and
move the stitches from the holders to the knittng needles.
Attach
yarn at underarm on right side of work and K across body (80 sts).
Work in st st keeping K3 garter border for 12 rows
Row 13: Repeat
row 16 of top of sweater, but end with k3. (43 sts) (Right
Side)
Row 14: Repeat
row 17, but end with K3.
(83 sts)
Rows 15-18: Work in
st st keeping K3 garter border
Row
19: K3,
*K2tog, YO, repeat from * ending with yo, K3. (80 sts)
Rows 20-23: Work in
garter stitch (knit every row)
Bind off loosely.
Sew
sleeve seams. Crochet a chain to thread through eyelet in top of
sweater or use a pretty ribbon.
Hood for the
Sweater
(Photo
copyright 2018 Gloria Vinson)
 Cast on 48
st on size 10.5 (or size you used for your size sweater). Cast on 48
st on size 10.5 (or size you used for your size sweater).
Knit 3 sts at the beginning and
end of each row
Row 1:
K 3, Knit across row
Row 2:
Knit 3, purl to last 3 sts, k 3
Repeat rows 1 and 2 for 6" for newborn size sweater. (smaller for dolls
etc)
Next
row, k3;*k1, k2 together, repeat from* till 3 st. from end;
k3.
Then:
keeping k3 edging on each end; knit k1, p1 ribbing for about 1", ending
with a 'wrong side' row.
Next
row: k
across.
Next
row: p across.
Next
row: k3, *inc1 (k in front and back of st) in next st, k1,
repeat from* across to 3 st from end, k3.
Next
row: begin
row 7 of 5HBS, using the st. on needle instead of cast-on.
To
finish: Fold hood in half, wrong sides together, and sew
cast-on edges together from back to front.
NEW Button front ADDITION

copyright 2003
Mary Cowley
Button down front, to avoid the ties.
"I
worked the pattern exactly the same EXCEPT- I added 2 stitches
on
either side of the sweater so when I cast on I did 38 sts instead of
the called for 34. I basically just made a k5 border instead of a k3
border. I used 5/8" diameter buttons.
I
worked the button holes as follows: at the beginning of the buttonhole
rows K2 tog, yo, knit 3 rem sts of border. Then the rest of row as
pattern calls for. I made the button holes on rows 3, 15 and 27 of the
top section of the sweater body and rows 8 and 20 of the second
section. (total of 5 button holes) I didn't change any of
the
pattern except for the border, so you just need to remember to add 2
knit stitches at the beginning and 2 at the end of each row throughout
the body of the sweater. Here is a picture if you want to see what it
looks like (click on it for a bigger view)
Matching Booties (and
BONNET from fiber gypsy)
Baby Booties to match the 'Weekend
Sweater"
Materials:
Size 10-1/2 [Ed. note: 6.5 mm]knitting needles, 4-ply (worsted weight)
yarn [Ed. note: 55-75 yd/oz, 180-240 /100g]
* Cast on 22 stitches, work K1, p1 for 3 rows to form ribbing.
* Row 4: Knit
* Row 5: Purl
* Row 6: (Pattern) K1, *k2tog across row to last st. *, K1.
* Row 7: K1, pick up stitch between and below next st, continue
until last 2 sts, K2.
* Row 8: Knit
* Row 9: Purl
* Row 10: Same as row 6.
* Row 11: Same as row 7 (this pattern row is later used to run ch thru
for ties)
* Begin instep: Knit 7 sts, place on holder, K8 and place remaining 7
sts on another holder. (22 sts)
* Work the 8 sts of instep in K1 row, P1 row for 10 rows.
* Break yarn off at end of 10 rows. End with knit row and place the 8
sts on holder also.
* Pick up 7 sts on holder plus 5 sts along side of instep, 8 sts at end
of instep, 5 sts along other side of instep and remaining 7 sts on the
other holder.
* Work these 32 sts for six rows in a K1 row, P1 row, on 7th row bind
off.
* Sew up bottom and back of bootie.
* Crochet a single chain to use as a tie for the booties, one for each.
* Pom Poms can be added to the end of the ties.
|
